IMPORTANT:
My Passport Wireless, Wireless Pro save products images and files from computers, tablets and smartphones to this single portable drive using a wireless connection.
Need more help?
Answer ID 34297: WD My Passport Wireless End of Support
Support ended for My Passport Wireless Mobile app on December 31, 2024.
This means there will be no further updates, and it is no longer available for download.
As a secondary option to continue using your drive, connect it to the computer as outlined in the User Manual on page 19.
IMPORTANT:
Charge the battery before use as it may have lost power during shipping.
The steps below explain what to do.
- Connecting wirelessly to the My Passport Wireless Pro via a web browser or mobile app.
- Enabling the FTP feature on the My Passport Wireless Pro.
- What configuration settings are needed on the Camera.
Set Up My Passport Wireless Pro
 |
Make sure the computer is wireless enabled. |
- Make sure the My Passport Wireless Pro drive is on and the Wi-Fi LED is lit.
- Do one of these.
- On iPhone, iPad, or an Android device, tap “Settings” and “Wi-Fi”.
- In Windows, click the network icon in the notification area.
- On a macOS, click System Preferences > Network > Wi-Fi.
- Select My Passport (2.4 GHz) -XXXX or My Passport (5 GHz) -XXXX from the Network list.
Replace the XXXX with the last four characters of the MAC address.
The default password is on the Quick Install Guide and the sticker on top of the My Passport Wireless Pro.
If the sticker or Quick Install Guide cannot be located, the default password is the last 8 characters of the serial number.
- Open a browser and type one of the following:
- Windows computer: http://mypassport
- Windows or Mac computer: http://192.168.60.1 (the drive’s default IP address)
- Mac computer: http://mypassport.local
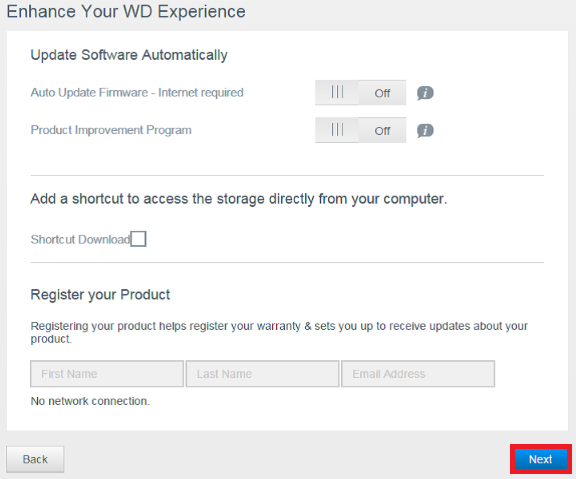
- Click I agree to the License Agreement.
Click I Accept.
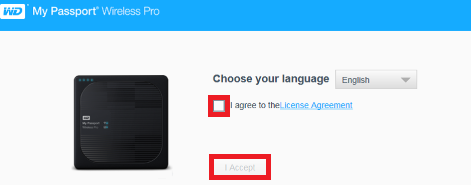
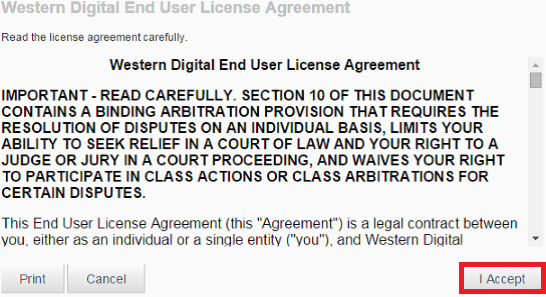
- Click I Accept.
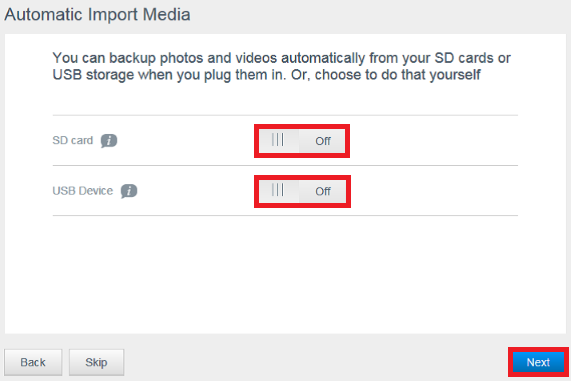
- Click one or both of the toggle buttons to On.
Click Next.
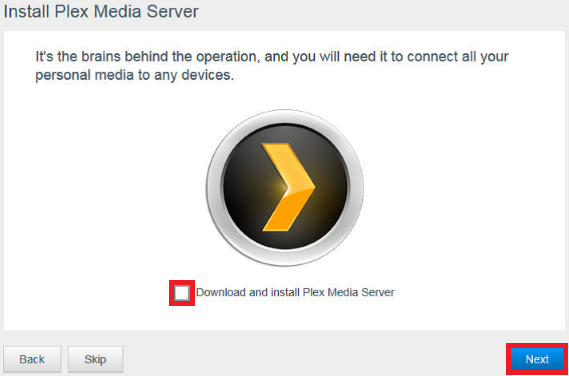
- Click Download and install Plex media Server.
Click Next.
Click Skip if choosing not to install Plex.
- Click Next.
- Click Finish.

Use My Passport Wireless app on a Mobile Device
- Download My Passport Wireless app from the App Store or Google Play store.
- Go to mobile device Wi-Fi Settings.
Join the My Passport Wireless networking. - Go to the home screen and find the My Passport Wireless app.
Tap My Passport Wireless icon. - Tap View License Agreement.
- Tap Agree.
- Tap Allow to allow analytics.
- Tap OK.
- Tap My Passport Wireless.
Enable FTP on the My Passport Wireless Pro
IMPORTANT:
-
File Transfer Protocol (FTP) enables the transfer of content to and from your drive’s Public folder through FTP.
-
The drive supports default Anonymous login.
-
The My Passport Wireless Pro drive is compatible with wireless cameras that support FTP.
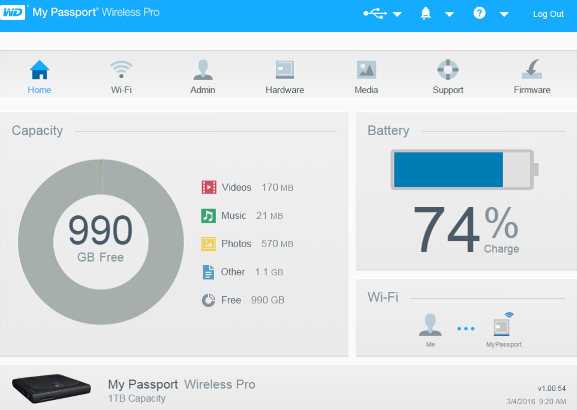
- Access the Dashboard.
Need more help?
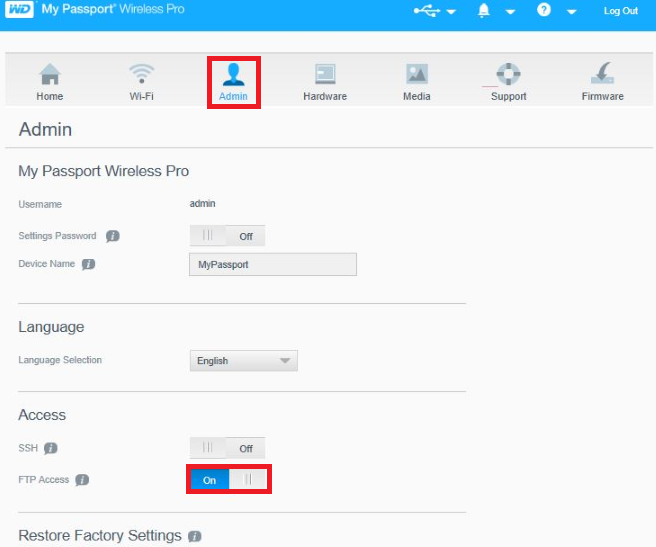
Answer ID 19786: Steps to Access the Dashboard on My Passport Wireless - Click Admin.
Click the FTP Access to On.
What to configure on the camera or other FTP device
-
Use the FTP settings below to connect a camera or other device to the My Passport Wireless Pro drive.
After starting the FTP Server Connection adjust the following two items in the Canon Camera; all other settings can be left as default.
-
- FTP Server Address: 192.168.60.1(Unless changed from default.)
- FTP Server Port Address: 21 (Not changeable.)
- Passive Mode: (Should be disabled.)
- Proxy Server: (Should be disabled.)
- Login Method/Name: Anonymous (No password required.)
- Target Folder: Public (Case sensitive.)
- FTP Server Name or Address must be changed from 192.168.1.1 to 192.168.60.1
Leave the PORT number at 00021.
-
The Target Folder must be changed from "ROOT" to "Select Folder" then set the folder LOCATION to Storage/folder name.
The folder name will be created automatically if it does not exist.
Need more help?Canon: Canon Wireless Communication Function Instruction Manual
-